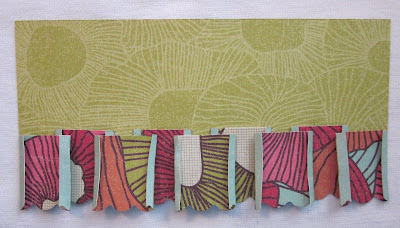
This pleating is so easy! Watch out though, it becomes addicting!
 I saw this idea quite a while ago in the blog world, so the original idea isn't mine, but the tutorial pictures and directions are mine.
  1. Cut a 1 1/2" strip from your paper. Any length you want, you may need two or three strips depending on the length of your pleat. For my layout I had a 8 1/2" pleat and needed 11 pleat pieces.
  2. Use a decorative edge punch and punch along one edge of each strip you cut. I used the Fiskars scallop punch.
  3. Cut the strip into 1 1/4" pieces.
 4. Fold two sides in, as small of a fold as you can.
 5. Ink the edges, as much or as little as you like.
  6. Cut a piece to adhere the pleats to in whatever length you desire and at least 3/4" wide.
 7. Lay the larger piece you just cut onto the table. Space out pleats below it. You will want to have one less pleat for the top layer.
 8. Flip the larger piece over and with a pencil, mark the center of the top layer of pleat pieces.
 9. Put adhesive/glue on the marks and adhere the pleat pieces about 1/4" or a bit more from the bottom edge. (I used my ATC gun)
 10. Put glue/adhesive in between each pleat for the rest of the pleated pieces. Adhere the pleated pieces about 1/8" from the bottom to give them a bit more length.
  The above picture is what it should look like from the back. Below is what it should look like from the front.
  I covered the backside with a liquid glue when gluing to my card and layout. This helped secure the pieces better and allowed me to nudge them just a bit if needed.
So easy and fun!
I hope you enjoyed the tutorial! If you end up giving the pleats a try let me know! I'd love to see it!
Thanks for stopping by!


.JPG)


 Slide the prongs around the center knot.
 Here is the finished flower!
